Industry News

How to Use Automotive Masking Tape: A Complete Guide for Perfect Paint Results
July 15, 2025

How to Use Automotive Masking Tape: A Complete Guide for Perfect Paint Results

When it comes to achieving a flawless finish in automotive painting, automotive masking tape plays a vital—yet often underestimated—role. Whether you're a professional body shop technician or a DIY car enthusiast, using the best automotive masking tape correctly can make the difference between a crisp paint line and a messy edge.

In this article, we’ll walk through everything you need to know about using masking tape for automotive painting, how to apply it like a pro, and why the right automotive performance masking tape matters.

What is Automotive Masking Tape?

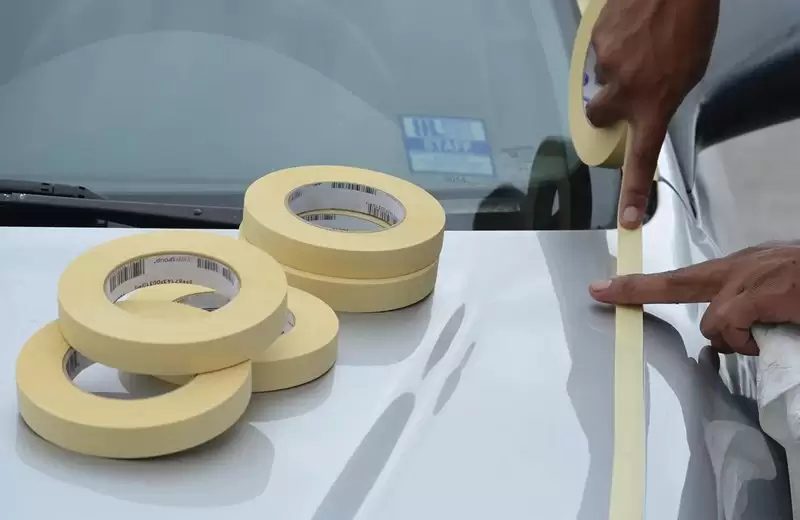
At its core, automotive masking involves covering parts of a vehicle that shouldn't be painted—like windows, trim, or rubber seals. For this purpose, autobody masking tape is designed with special features:

Medium to high tack for solid adhesion on metal, glass, rubber, plastic, and painted surfaces

Clean removal with no sticky residue

Resistance to high temperatures and paint solvents

Compatibility with both waterborne and solvent-based paints

Flexible backing to conform to curves and contours

The tape typically uses a crepe paper or polymeric film backing with rubber or acrylic adhesive, depending on the application.

Why Use Professional Automotive Masking Tape?

Let’s be honest—choosing a generic tape from the hardware store might seem like a quick fix. But that decision could ruin hours of prep work. A professional masking tape ensures:

Sharp paint lines without bleeding or feathering

No paint lifting or tearing when removed

High-temp durability in baking booths (up to 250°F or more)

Cleaner jobs, faster turnaround

So, if you're doing anything from a small bumper touch-up to a full-body paint job, investing in the best automotive masking tape isn’t optional—it’s essential.

Step-by-Step: How to Use Automotive Masking Tape

1. Prepare the Surface

Before anything else, make sure the surface is clean and dry. Use isopropyl alcohol or a dedicated degreaser to wipe down the area where tape will be applied. Any dirt, wax, or oil will weaken the tape’s adhesion and compromise the edge. Pro Tip: Don’t rush this step. Even a tiny patch of dust can ruin a clean line.

2. Choose the Right Tape Width

Use narrower tape (e.g., 12mm or 18mm) for tight curves or detail areas like around badges and trim. Wider tape (24mm or 36mm) is better for long straight edges like door panels or rooflines. And if you're working on a custom job? Try colourful masking tape for easy identification of different stages or masking zones.

3. Apply Tape with Controlled Tension

Lay the tape down lightly but firmly, pulling it at a shallow angle (about 15°). Avoid stretching the tape as it may lift once it relaxes. Use a plastic squeegee or even your fingernail to press the edges down securely.

Especially in areas with tight curves—like around wheel arches or door handles—make sure the tape is fully conformed to prevent paint bleed.

4. Overlap and Seal the Edges

If you're using masking film or paper with your tape, always tape over the edge to prevent lifting during the spray. Ensure overlaps are snug—no gaps.

If the car will go through a baking booth, check that your masking tape is automotive performance masking tape rated for high temperatures (minimum 120°C).

5. Spray Your Paint

Now you’re ready to paint! Because high-quality tape for automotive painting resists solvents, you won’t have to worry about the adhesive breaking down mid-spray. 

Quick Reminder: Don’t forget to mask off vents, tires, emblems, and mirrors if they’re close to your spray area.

6. Remove the Tape at the Right Time

This step is crucial. Remove the tape within 30 to 60 minutes after the final coat—before the paint fully cures. This prevents the tape from tearing or pulling the new paint.

Pull slowly at a 45° angle to avoid damaging the finish.

Bonus Tip: If you're painting in layers or using a clear coat, re-mask for each stage if needed—never reuse old tape.

Pro-Level Tips for Cleaner Results

Always use autobody masking tape designed specifically for vehicles. Don't substitute with general-purpose masking tape or painter’s tape.

Use heat (a heat gun or warm workshop) to slightly warm the tape and surface in cold weather—it improves adhesion.

Combine with plastic sheeting or masking film for large surface areas.

Store your tape in a cool, dry area to maintain tackiness and shelf life.

Common Mistakes to Avoid

Using low-grade tape that leaves residue
Applying tape over wax or wet surfaces
Leaving tape on too long (especially under UV or high heat)
Stretching tape during application, causing lift or curl
Painting over loosely applied edges—causes jagged lines and overspray

Recommended Use Cases for Automotive Masking Tape

Collision repair and refinishing

Two-tone or multi-color paint jobs

OEM painting processes

Custom vehicle graphics

Touch-up and spot repairs

DIY car enthusiasts restoring classic vehicles

Final Thoughts: Quality Tape = Quality Finish

Using the best automotive masking tape is about more than just sticking something on and hoping for clean results. It’s a small decision with a huge impact on your final outcome.

From masking film compatibility to paint edge precision, quality automotive masking products streamline your workflow, reduce clean-up, and deliver the pro results your customers (or you!) expect.

So the next time you gear up for a spray job—ask yourself: is your tape working for you or against you?

Explore Our Range

At QKD, we supply a full line of automotive performance masking tape solutions trusted by auto body shops, refinishers, and OEM partners worldwide.

1.Temperature-rated

2.No bleed or lift

3.Zero residue

4.Easy hand tear

5.Perfect for curves and contours

Related Articles

Share this Post

Home Products Contact